
My Flesh Tearers were back in action again against the Space Wolves, my 3rd game against them this edition, after a short break fighting some World Eaters (which I never did a battle report about). We were playing a 2000pts game but on an extremely narrow table, 6' x 2.3', so just over half the normal width. With this in mind we decided to use the narrow board edges as deployment zones as standard so it was another game going the length of the table (3/4 of my 8th edition games have been this way now). This did make manoeuvring around the board harder because it was almost impossible to try and flank the opponents. Still a fun game so I decided to do another battle report on it.
The Forces
Flesh Tearers - 1999pts & 7CPs
Battalion Detachment
HQ
Librarian - Jump Pack, Bolt Pistol, Force Stave, Shield of Sanguinius, Unleash Rage
Sanguinary Priest - Bolt Pistol, Chainsword, Jump Pack
Troops
5x Scouts - Camo Cloaks, 4x Sniper Rifles, Missile Launcher
10x Tactical Marines - Combi-Plasma, Plasma Gun, Missile Launcher
10x Tactical Marines - Plasma Pistol & Power Axe, Grav-Gun, Missile Launcher
Elites
4x Sanguinary Guard - 4x Death Masks, 3x Angelus Boltguns, 3x Encarmine Swords, 1x Inferno Pistol, 1x Encarmine Axe
Sanguinary Guard Ancient - Death Mask, Angelus Boltgun, Encarmine Axe
Fast Attack
10x Assault Marines - Jump Packs, Powerfist
Heavy Support
Vindicator - Storm Bolter
Vanguard Detachment
HQ
Chaplain - Jump Pack, Bolt Pistol
Elites
Dreadnought - Multi-Melta, Dreadnought Combat Weapon w/ Storm Bolter
Furioso Dreadnought - Frag Cannon, Furioso Fist, Heavy Flamer, Magna-Grapple
5x Terminators - 5x Storm Bolters, 4x Power Fists, 1x Power Sword
Space Wolves - 2000pts & 7CPs
Battalion Detachment
HQ
Ragnar Blackmane
Ulrik The Slayer
Troops
12x Blood Claws - Power Fist, Plasma Pistol, Flamer
5x Blood Claws
8x Grey Hunters - Chainswords, Bolt Pistols, Power Fists + Wolf Guard Pack Leader w/ Storm Shield & Thunder Hammer
Fast Attack
3x Thunderwolf Cavalry - 3x Storm Shields, 3x Thunder Hammers
Heavy Support
Land Raider Crusader - 2x Hurricane Bolters, Multi-Melta, Twin Assault Cannon
Dedicated Transport
Rhino - Hunter-killer Missile, Storm Bolter
Vanguard Detachment
HQ
Wolf Guard Battle Leader - Storm Shield, Wolf Claw
Elites
Lone Wolf in Terminator Armour - Wolf Claw (pair)
Lone Wolf in Terminator Armour - Storm Shield, Thunder Hammer
5x Wulfen - 5x Frost Claws
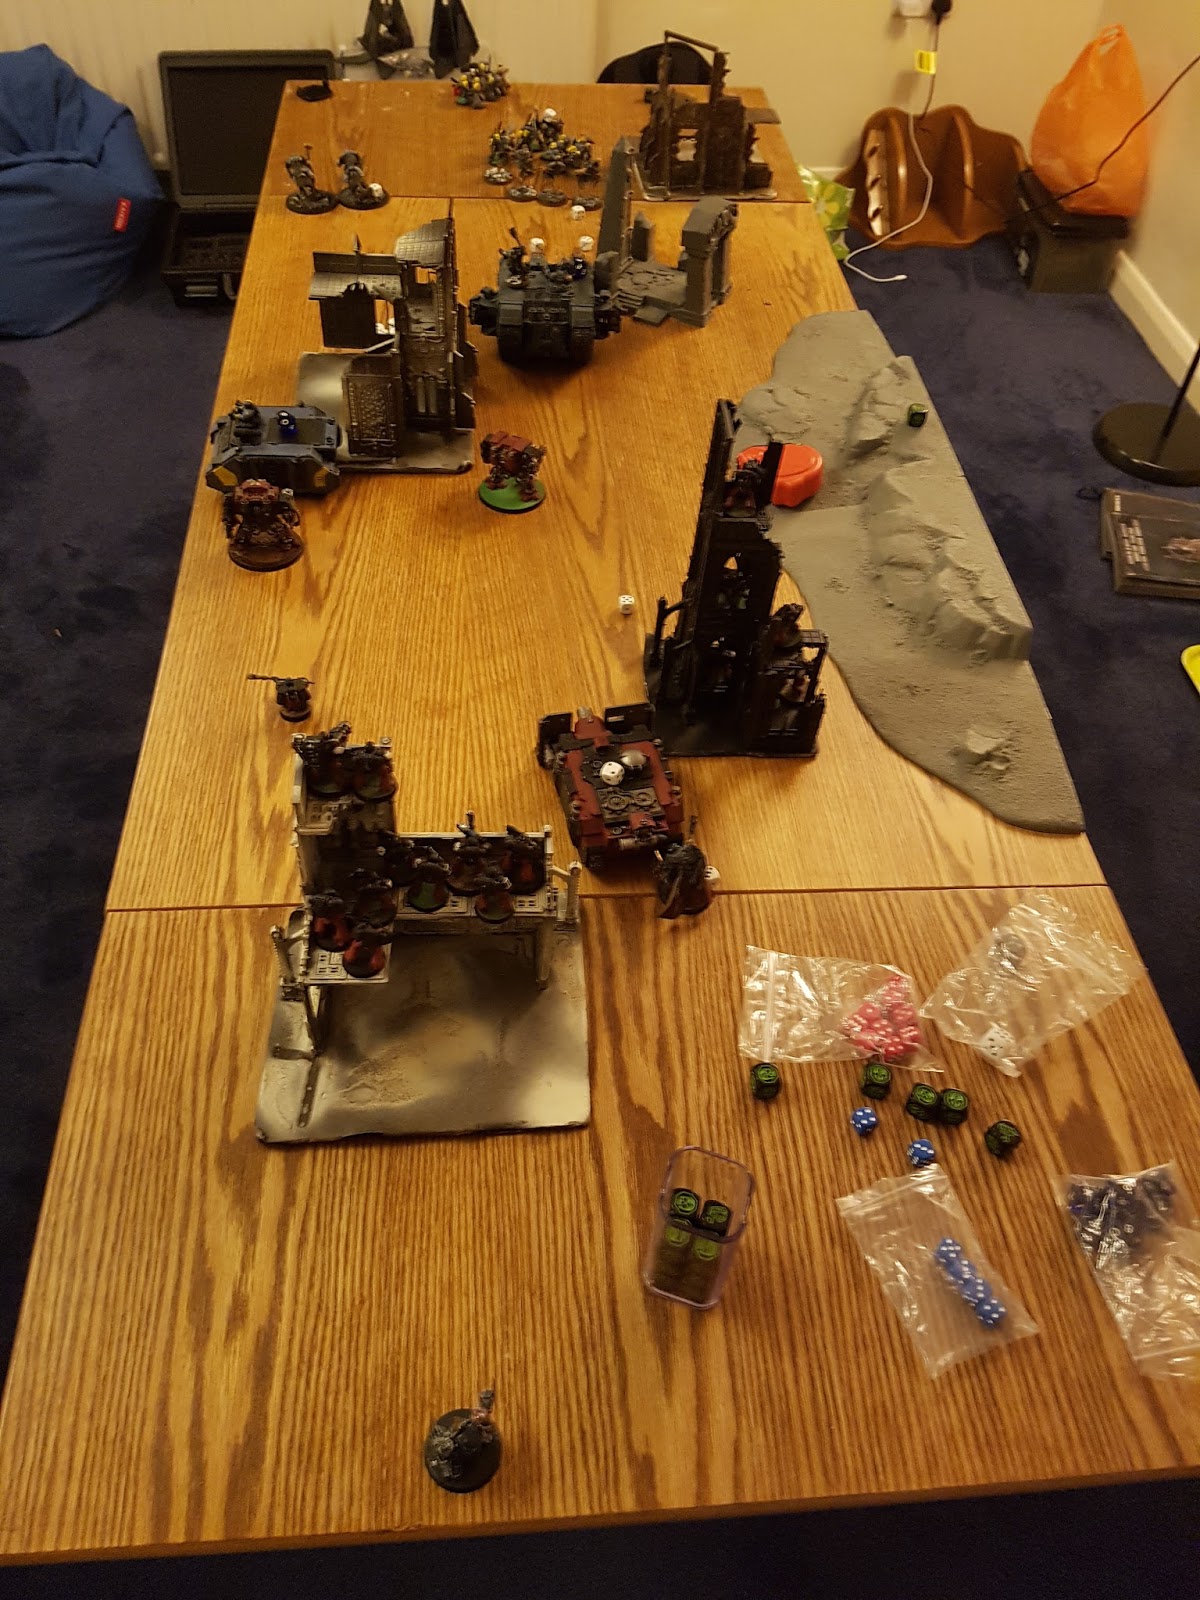
Deployment
 |
| Deployment |
The objectives were both in the buildings at either end of the table within the deployment zones.
The Space Wolves deployed in more or less a straight line, with the Land Raider in the centre with the Battle Leader, Ragnar (the warlord) and Wulfen in it and the Rhino to the right with the Grey Hunters and Ulrik in. The two units of Blood Claws were both in the objective building to hold it and try and defend against any back field drops I tried. The Wolf Cavalry were next to the Land Raider to try and get forwards fast but use the Land Raider to block line of sight if needed. Both Lone Wolves were held back to deep strike in.
 |
| Deployment |
The Space Wolves finished deploying first so we rolled off to see who would go first with them having +1 to the roll. They won and I couldn't seize so they went first.
The Battle
 |
| End of Space Wolves turn 1 |
 |
| End of Space Wolves turn 1 |
The Blood Claws just held in place to try and keep the objective and the Lone Wolves stayed off the field for now. That meant that the only thing that could shoot was the Land Raider and only the Scouts were in range but they were in a ruin with their camo cloaks which didn't make them the easiest target.
The Land Raider unloaded on the scouts with everything it had but either missed or wasn't able to move them from cover and after a full round of shooting the Scouts had only lost one sniper rifle.
 |
| End of Flesh Tearers turn 1 |
 |
| End of Flesh Tearers turn 1 |
My Snipers went to work on the Calvary and managed to score 2 mortal wounds and 2 regular wounds with them killing one and putting a wound on another, however the Space Wolves used a command point to re-roll one save which was successful this time so only one died. All 3 of my missile launchers fired krak missiles at the Land Raider hoping to slow it down or put a dent in it before it reach my lines but either missed or failed to damage it so it was free to keep coming towards my lines.
Turn 1 for both armies was quite uneventful just trading a Scout for a Thunder Wolf Calvary and getting slightly closer to each other.
Turn 2 and things started to happen. During movement all three Space Wolves HQs jumped out of their transports. The Battle Leader and Ulrik went into the ruin to take out my scouts and the Rhino took cover in the ruin below them ready to jump out the Grey Hunters if needed and to hide from the advancing Dreadnoughts. Sensing my plan of dropping half my army behind his lines Ragnar fell back to back up the Blood Claws holding the objective. The Wulfen in the Land Raider carried on forwards towards my lines. The Calvary moved up towards my Scouts hoping that their thunder hammers would help again the closing Furioso. Finally the Lone Wolf with the thunder hammer came in behind my Vindicator.
 |
| End of Space Wolves turn 2 |
 |
| End of Space Wolves turn 2 |
In the ruin the Battle Leader and Ulrik charged my Scouts. The Battle Leader charged first and took an unlucky krak missile to the face knocking him down to just 1 wound remaining. Ulrik followed up now safe from overwatch and between them they wiped out the remains of the squad scoring 1st blood.
In my 2nd turn I dropped in most of my reserves, only keeping my Sanguinary Guard and Ancient back to react to anything that happened in the Space Wolves next turn. Just as Ragnar predicted my forces landed in the Space Wolves back field hoping to hit them from behind and take their objective. My Sanguinary Priest, Chaplain and Assault Squad landed as close as possible to Ragnar and the Terminators landed ready to hit the remaining Cavalry.
 |
| End of Flesh Tearers turn 2 |
In the psychic phase I managed to get both powers I wanted off and the Space Wolves had nothing to try and deny me. 1st off I cast smite on the Lone Wolf to soften him up and then Shield on my melta Dread to offer him some protection from the Land Raider and it's cargo if they decided to get out next turn.
 |
| End of Flesh Tearers turn 2 |
Charging was a mixed bag. My Furioso failed a charge against the Rhino but the other Dread was successful in charging the Land Raider and put a few more wounds onto it. My Assault Marines and Chaplain made it into combat with Ragnar but the priest failed his charge. Together they were able to bring him down before he was even able to react and scored me Slay the Warlord. My Terminators failed a charge against the Cavalry and one of my Tactical Squads failed to charge the Lone Wolf so I knew he was going to either destroy or tie up my tank for another turn because I hadn't moved anything over to block him instead hoping that smite and two squads of shooting would take him out.
End of turn 2 and I had Slay the Warlord and an objective while the Space Wolves had First Blood and an objective and both of us had squads behind our lines for us to deal with.
Turn 3 did not go very well for me. I head learnt to fear the Wulfen but I guessed they would try and protect the Land Raider rather than backing up the Blood Claws, instead they exited their transport and ran back to engage my deep strike units. The Blood Claws also moved over to try and take them out before I could claim his objective. The Thunder Wolf Calvary also moved back to engage the Terminators. Ulrik jumped into the Land Raider that backed out of combat with my Dreadnought and the Battle Leader moved towards it to tie it up for a turn with his last wound hoping his thunder hammer would take the Dread out before he died a glorious death, it was a hard choice for the Space Wolves, they had the choice between holding him still and healing him or moving him so he could make the charge. The Rhino moved to block the Furioso from getting past to the back line to help but kept the Grey Hunters inside out of fear of the frag cannon/heavy flamer. The last Lone Wolf came in with his lightning claws behind the Tactical Squad holding my objective hoping to rip them apart.
Shooting was clearly not the Wolves strong point, only the Rhino and Blood Claws could shoot and neither managed to do any damage to anything in the shooting phase.
 |
| End of Space Wolves turn 3 |
 |
| End of Space Wolves turn 3 |
Further up the table the Battle Leader charged my Dread and thanks to shield of Sanguinus wasn't able to do any damage to it before he was unceremoniously squashed. The thunder hammer Lone Wolf successfully charged my tank again putting more damage onto it but failing to kill it and the lightning claws Lone Wolf failed his charge into my Tactical Marines.
With the start of turn 3 I had to rethink my battle plan. I started by moving my Vindicator, Chaplain and Priest out of combat. The Chaplain and Priest I put as far from the Blood Claws and Wulfen as I could hoping that the Space Wolves would fail a charge and I could either keep them away from them in the back or run them away up the board allowing me the option of either a last minute objective grab or Linebreaker if I could keep them away from the bigger units long enough to survive. I also moved my Librarian back to deal with the Lone Wolf, I wasn't taking any chances with him this turn.
My biggest decision was what to do with my Sanguinary Guard who needed to deep strike in. If I dropped them in the Space Wolves half to back up my 2 remaining HQs I had a better chance of getting the objective and Linebreaker but they would still be massively outnumbered and chances are chewed up and spat out by the Cavalry, Blood Claws and Wulfen. However I also needed to back up my own lines against the 2 Lone Wolves that were getting them Linebreaker and causing a lot of problems. But if I went to deal with them I was basically playing for a draw since I could only get the Space Wolves objective and Linebreaker with my 2 wounded and outnumber HQs and the Space Wolves had First Blood so even if I cleared my own back lines and kept my Warlord alive I could only get a draw if I couldn't get either their objective or Linebreaker myself. I decided that dropping them to help in the Space Wolves half would only get them killed and lose me the game so dropped them in my own half to deal with the Lone Wolves and hope that either my Chaplain and Priest survived to get me the win or I played for a draw. I dropped them equal distance from both Lone Wolves to give me a choice of targets depending on how my shooting phase went.
In my Psychic phase I failed to cast smite but managed to get unleash rage off onto my Furioso giving him and extra attack.
 |
| End of Flesh Tearers turn 3 |
 |
| End of Flesh Tearers turn 3 |
Both My Dreads also made charges, my Furioso into the damaged Rhino (still full of juicy Grey Hunters just waiting to get a frag cannon to the face) and my melta dread into the now battered Land Raider. I got the Rhino down a few wounds and the Land Raider down to just a single wound remaining.
The start of Space Wolves turn 4 and the Wulfen decided that the Blood Claws could deal with my HQs themselves so them and the Cavalry finally went to aid the damaged Land Raider, as did Ulrik who got out of it. The Grey Hunters managed to get out of the Rhino and moved towards my Vindicator looking to finish the job that the Lone Wolf had started. It was a risky move, because of the position of my Furioso they couldn't take the most direct route so had a long charge distance to get, if they failed it they would be in the open and easy prey for my Tactical Squad in the near by ruin as well as the Vindicator itself which so far this game had only fired it's gun in overwatch. The Blood Claws closed on the remains of my back line attack detachment and the lightning claws Lone Wolf moved towards my Sanguinary Guard so he wouldn't fail the charge like they had.
In the shooting phase few shots were fired, but their were mixed results. The Blood Claws, who earlier in the game had made Orks look like sharpshooters, managed to use their pistols to kill my Priest. The Grey Hunters on the other hand fired at my Tactical Marines in the ruined tower and only cleared one more bolter marine. With everything else either without a gun or tied up in combat we started the assault phase.
 |
| End of Space Wolves turn 4 |
 |
| End of Space Wolves turn 4 |
The thunder hammer Lone Wolf had managed to put some wounds onto my Sanguinary Ancient but still hadn't managed to kill anything, in retaliation I manage to strip it's last wound again but again he managed to stand up again and using his ability to fight again when he does killed my Librarian scoring the Space Wolves Slay the Warlord as well.
The game was starting to look lost, with my Warlord, Sanguinary Priest and Chaplain dead even if I managed to clear my deployment zone and hold my objective I would still lost the game. I needed to score Linebreakers and stop the Space Wolves scoring it just to get a draw and had to hold both objectives to win.
With that in mind I started moving my fastest units out of combats hoping to get them down the field and score Linebreaker if the game carried on long enough. Both my Sanguinary Guard and Ancient left combat although the fly keyword meant they were still able to shoot their angelus boltguns. I also moved my Tactical Squad out of the ruined tower to give them all line of sight at the Grey Hunters who had purposefully wedged up against the ruin to stay out of line of sight of most of the unit.
 |
| End of Flesh Tearers turn 4 |
 |
| End of Flesh Tearers turn 4 |
Combat rolled around and the thunder hammer Lone Wolf managed to kill a Tactical Marine, but again was stripped of his last wound before standing back up again and killing another one. This was a 50/50 chance to get up each time he lost his final wound and so far had managed it 3 times in a row. My Furioso Dreadnought was up against the Rhino which only had 2 wounds left but failed to wound with anything and I was out of CP to re-roll with by this point. My plan to kill it this turn instead of leave combat and do nothing else this round had backfired massively and now I was stuck in combat was a worthless unit again because of some seriously poor dice rolls.
 |
| End of Space Wolves turn 5 |
 |
| End of Space Wolves turn 5 |
In combat the Wulfen charged my Tactical Squad and and wiped them out without much trouble. Ulrik and the Cavalry both failed a charge against my Dreadnought so weren't able to take advantage of him being tied up in combat for another turn, however the Furioso was also not able to take advantage either and yet again failed to cause a single wound to the Rhino meaning it was still stuck in combat despite only having 2 wounds remaining.
The Lone Wolfs had different fortunes this round. I managed to kill both with my Tactical Marines since they each only had a single wound left. This time the Lone Wolf with the thunder hammer stayed down but the lightning claws was able to get back up and in return they killed all but 4 for my Tactical Marines.
 |
| End of Flesh Tearers turn 5 |
 |
| End of Flesh Tearers turn 5 |
I shoot my angelus boltguns at the Grey Hunters holding my objective before charging the Lone Wolf with my Sanguinary Guard and Sanguinary Guard Ancient. Again I managed to strip his final wound and again he got back up and carried on however wasn't able to do any damage to me in return.
That was the end of turn 5. I'd failed to complete my objective of killing the Lone Wolf or clearing the Grey Hunters from my Objective. I knew I couldn't win or even draw any more but it was just how badly would I lose. We rolled to see if the game carried on for another turn and it did.
 |
| End of Space Wolves turn 6 |
 |
| End of Space Wolves turn 6 |
Ulrik tried to charge my Furioso but finally doing something useful was killed by the frag cannon and heavy flamer on overwatch.
At this point I decided to concede and we ended the game. I had only wanted to try and see if I could clear my deployment zone to get some honour back but now I was left with a Furioso against Wulfen, Grey Hunters, Blood Claws, a Lone Wolf and a Rhino (which I already knew was impossible for a Dreadnought to kill apparently).
Overall it was a really fun game and we are definitely starting to get a lot quicker and the games are flowing a lot better now we are used to 8th Edition. I know I made a few mistakes during the game but also think I was very unlucky. I shouldn't have placed the Scouts so close, if I had used the tower ruin instead I would have got more shots with them and wouldn't have given up First Blood so easy, with the board being so narrow they weren't able to force units to spread out to deal with them so didn't really serve their purpose of being a distraction. I also shouldn't have left my Furioso in combat for as long as I did, once the Grey Hunters were gone I didn't need to kill the Rhino so should have moved on.
Other issues I noticed was leaving my Vindicator open, I knew that the Lone Wolf would be coming for it because it is exactly what he did last time we played. I will be using other units as a screen in future, setting them up so that deep strikers can't get within charge range of it the turn they come in, maybe a few cheap Scout squads could act as a buffer. I also should have committed to blocking the Lone Wolf with a Tactical Squad after the Vindicator first fell out of combat like I did in our last game instead of hoping that shooting would take him down then having to make a extremely long charge when it didn't. I also think I need some heavier guns in my army to help take down armour faster and something to act as a distraction while my deep strike units get to work, like a Land Raider or flyer, so that sending reinforcements to help tackle my deep strikers isn't such a easy choice for my opponents.
I was let down by some bad luck at times, a few poor rounds of shooting didn't help and failing the charge against the Thunder Wolf Cavalry with my Terminators was devastating because they really needed to strike first. I also should have killed that Rhino (and in a lot fewer turns than I spent on it) which would have freed my Furioso up to support more and hopefully killed or done a lot of damage to the Grey Hunters inside that were my targets the whole time. The worst part is those Lone Wolves getting back up so often, it is only a 50% chance but they did it about 5 times before I killed 1 of them. They both should have been dead along time ago leaving my units free to be doing other things.
The Space Wolves played really well though and deciding to send the Wulfen back to support his back line instead of helping protect the Land Raider probably won him the game. Without them I would have done much more damage to the Blood Claws and might have been able to get myself in a position to counter the Wulfen when they did come back for me.
Overall a good game and I hope I learn from my mistakes this game and do better next time...that and praying to the dice gods extra hard next time because they clearly preferred Lone Wolves this game.
No comments:
Post a Comment